China procurement, global delivery, the way to your business success
English \ العربية \ русский язык
WordPress / WooCommerce
1.The necessary configuration
a)Website system is WordPress / WooCommerce;
Get plug-in code (https://www.shopv.com/upload/plugins/ShopV-woocommerce.zip)
2.The installation steps
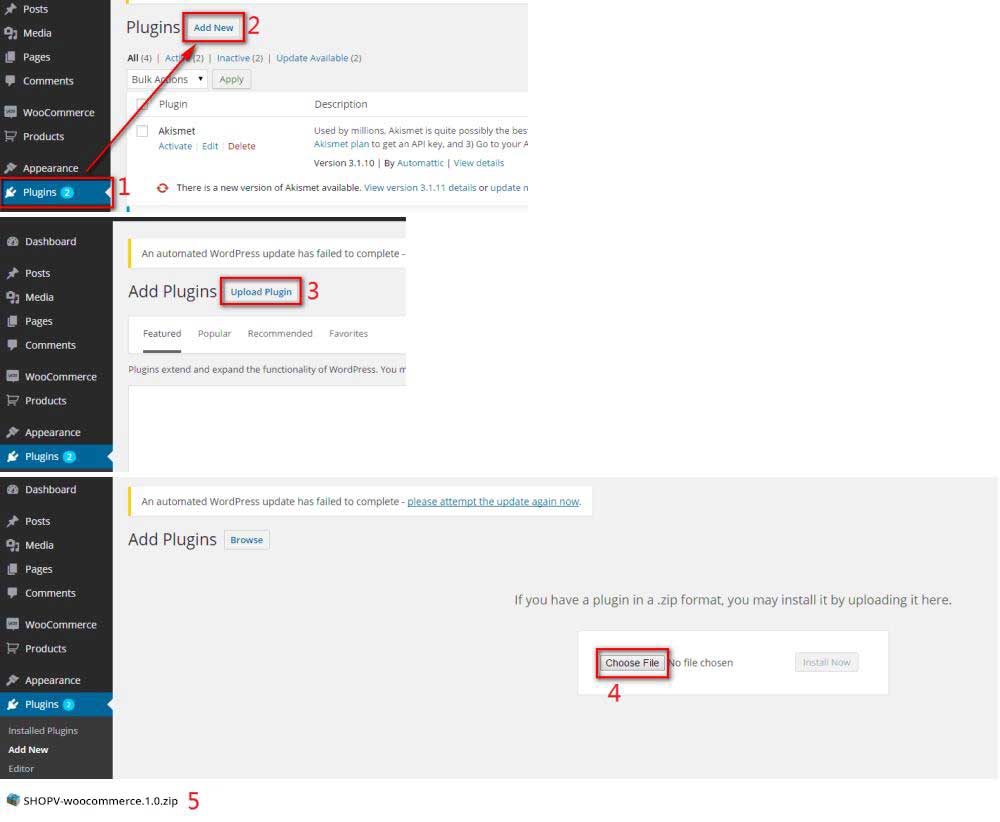
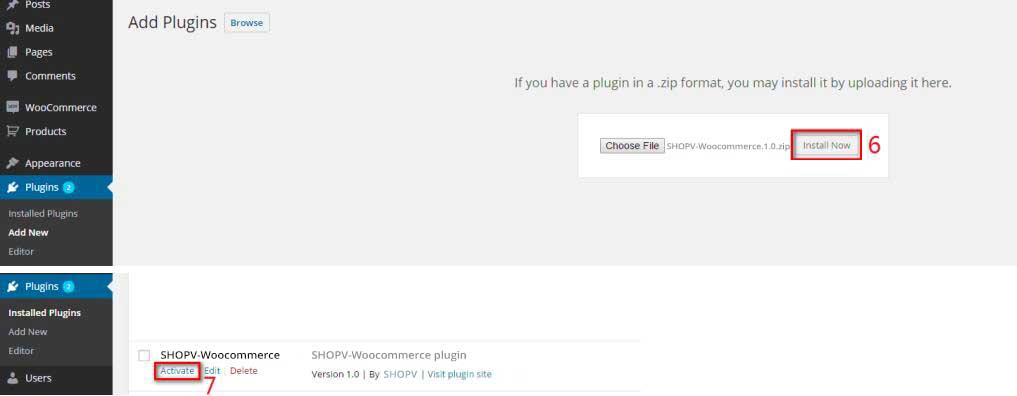
a)Add plugin, please follow the steps in the graph below, only seven steps. If will cost about one minute :


Now, you can see SHOPV plug-in button area:

Congratulations, you have successfully installed SHOPV plugin! Please continue to look at the Instruction below.
3.SHOPV OrderFulfillment for WooCommerce plug-in usage instructions
a)Set apikey to associate with your account
Firstly, please log in to the SHOPV backend, move the mouse to the avatar in the upper right corner, click on "Setting", and in the pop-up window, you can see "Api Key". Copy the apikey out.
Secondly, return to your WooCommerce site, fill in the apikey and prefix, and then save and update.
It should be noted that prefix refers to the order number prefix. For example, if you fill in "SHOPV" and the order number is # 10000, then the order number pushed to SHOPV will be "CD10000".


Second, back to your site, fill in the apikey:

b)Create Order

c)Create SKU

4.After the "Create SKU" or "Create Order" steps, you can click the "Go to SHOPV" button to verify SKU and order information in the SHOPV User Center.


